| Technical Models for the Glide Shot Put |
| Originally Published in: Techniques Magazine
Provided by: USTFCCCA
THE PRELIMINARY MOVEMENTS Locating the Rear Foot. The right (throwing side) foot is positioned flat, near the rear edge of the circle, directed away from the direction of the throw. GRIP AND LOAD Gripping the Shot. The shot should rest on the base of the fingers. The fingers should be spread slightly, and the thumb rests comfortably against the shot. The wrist is hyperextended in anticipation of its eventual flexion at release. It is advisable to assume the grip with the arm extended upward, so that the weight of the shot produces and maintains the hyperextension of the wrist. Loading the Shot. Without changing wrist and hand positions, the shot is lowered and the forearm rotated inward until the shot is cradled against the neck close to the chin with the thumb touching the collarbone. Elbow Positions. Elbow positions vary. A lower elbow that is positioned close to the torso provides better support to the shot, while a higher elbow, positioned somewhat away from the torso resembles more closely the position prior to the strike. Positioning the Upper Body. The torso should be lowered so that the back is approximately parallel to the surface, the head in neutral alignment with the spine, the shoulders directed opposite the throwing direction. This position places the shot outside the ring and behind the right (throwing side) foot, effectively lengthening its path during the put. The left (nonthrowing) arm should be extended and hang downward loosely. The Legs. The right knee should be slightly flexed, with nearly all bodyweight placed on the right foot. The left leg is extended toward the toeboard somewhat with the foot resting on the surface lightly to preserve balance. INITIATING THE GLIDE The Left Leg. The left leg is lifted and moved toward the right leg so that the knees are near each other, and both knees and hips are flexed. Unseating. The thrower unseats by initiating a slight fall in the throwing direction. THE PUSH-OFF The Legs. The right leg should push forcefully, using the entire surface of the right foot once the athlete's center of mass passes the right heel, displacing the body as a unit toward the front of the ring. At the same time, the left leg should extend so that the left foot moves toward the toeboard. Displacement. The entire body should displace as a unit in a primarily, but not completely horizontal direction. Trajectory Considerations. While the glide shows a predominately horizontal trajectory, it should show a vertical component. This vertical component is essential to providing the flight time needed to position body parts correctly for landing, particularly the right leg. The Hip Axis. As the pushup occurs, the hips should begin to open, turning slightly toward the throwing direction. Separation. Separation begins to be established as the hip axis turns with respect to the stationary shoulder axis. Preservation. The torso should rise only slightly, and all other positions of the upper body should be preserved. THE FLIGHT PHASE Positioning the Right Leg. The right leg moves back underneath the body, assisted by an extension-flexion reflex produced at pushoff. The right foot is turned counterclockwise so that it is directed 90 to 135 degrees from the direction of the throw at landing. The Hip Axis. The hips continue to open toward the throwing direction. Separation. Separation continues to increase as the hip axis opens with respect to the stationary shoulder axis. Preservation. The torso will continue to rise slightly, but all other positions of the upper body and shot should be preserved. THE DELIVERY POSITION THE RIGHT SIDE The Right Foot. The right foot should land near the center of the circle, directed 90 to 135 degrees from the throwing direction. Body weight should be centered on the ball of the right foot. The Right Knee. The right leg should be bent at the knee. Amortization. A slight yielding should take place as the right leg accepts impact. The passive right leg allows the subsequent turning to take place. Actively pushing off the right leg inhibits turning of the hip axis and is a common error. THE LEFT SIDE The Left Leg. The left leg should land in a nearly extended position near the toe-board and just left of center. The Left Foot. The left foot landing should occur very quickly after the right foot landing. The inside ball of the foot initiates contact with the surface. Teaching simultaneous landing of the right foot and left foot is common coaching practice. POSTURE AND TORSO POSITIONS The Hips. The hip axis should be directed 90 degrees from the direction of the throw. A nearly neutral alignment of the pelvis is required to enable subsequent turning of the hips. The Torso. The torso should be low and the chest positioned over the right foot at landing. Preservation. The separation established and all other positions of the upper body and shot should be preserved upon arrival in the delivery position. The shoulder axis should remain directed 180 degrees from the throwing direction. THE DELIVERY - INITIATING THE THROW Turning, Weight Transfer and Lifting. In the glide shot put, the turning of the hips, weight transfer and lifting involved in the delivery all happen simultaneously and at similar rates. The Saddle Position. At the midpoint of the weight transfer during delivery, the knees and hips exhibit slight flexion. This position corresponds to a low point in the shot's undulatory path. Achievement of this position is critical to the eccentric loading of muscle groups responsible for rotation and extension. Left Foot Position. Initiating the turn grounds the left foot solidly. Upon grounding it should be directed at approximately a 40 degree angle to the throwing direction, pointing slightly across the body. This produces an anatomical block of the turning hip axis as it reaches the direction of the throw. The Torso. As the torso turns, it moves slightly to the nonthrowing side, while the shot moves outward slightly. This combination of movements results in the shot leaving its position against the neck and moving laterally to a position near the throwing shoulder. THE STRIKE Separating from the Shot. As the torso turns, it moves slightly to the left, while the shot moves slightly to the right. This results in the shot moving away from the thrower's neck and places the shot approximately in front of the shoulder. This positioning allows the shoulder to contribute to the strike. The Putting Motion. The strike consists of a pushing movement, sequentially using the shoulder, elbow and finishing with a strong extension of the wrist. The elbow should be high and in line with the shot's path. This places the forearm in alignment with the shot's release angle, making the forearm an effective transmitter of force to implementation. This also directs the thumb downward during the strike. The Release. The thrower releases the shot with an extension of the wrist, using the fingers to apply force and a slight sideways spin to the shot. THE FINISH The Follow-Through. A complete and technically correct release elicits extension-flexion reflexes in the throwing arm that bring the arm across the chest at the completion of the throw. THE REVERSE The Right Foot. The right foot should move forward toward the front of the ring. The Left Foot. The left foot drops back and rises. The Torso. The chest lowers and turns toward the left side, continuing rotation. The thrower should not watch the flight of the shot. SPATIAL MARKERS AND ELASTIC ENERGY PRODUCTION Release Angles. The ideal angle of release in the glide shot put ranges from 35-42 degrees. THE PATH OF THE THROWER'S CENTER OF MASS The Sagittal Plane. The thrower's center of mass travels in an undulatory path in the sagittal plane. The center of mass is lowered during the preliminary movements. The center of mass rises during the flight phase and then lowers again as the thrower arrives in the delivery position. The final upward movement of the center of mass is seen as the shot is delivered and the strike occurs. Elastic Loading Points. The low points of the thrower's undulatory path in the sagittal plane enable elastic responses in the thrower's right side. THE PATH OF THE SHOT The Sagittal Plane. The implement, much like the thrower's center of mass, undulations in the sagittal plane. While the general path of the shot corresponds to the shot's angle of release, the undulations permit elastic loading points that increase elastic energy production in the event.
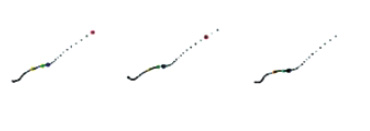
EXAMPLES OF TYPICAL SHOT PATHS IN THE SAGITTAL PLANE The Transverse Plane. The shot's path in the transverse plane shows a mild rotational component, consistent with the rotational movements of delivery.
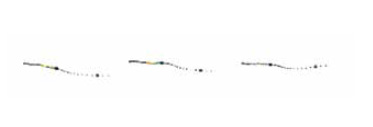
EXAMPLES OF TYPICAL SHOT PATHS IN THE TRANSVERSE PLANE TECHNICAL VARIATIONS Grip Options. With regards to the grip, novice shot putters locate the middle three fingers behind the ball, with the little finger and thumb on spread slightly wider in order to gain better control of the strike. More proficient throwers move the little finger behind the ball in order to provide more push on the implement. Elbow Positions. Lower elbow positions enable support of the shot from beneath, and are helpful to throwers who struggle with control of the implement. Higher positions, within reason, improve the elastic response produced across the chest during delivery. Dynamic Start Options. In order to increase momentum in the thrower/implement system, a dynamic entry can be utilized. Although the actual starting position may vary slightly, the athlete assumes a position with torso upright rather than parallel to the ground. The feet are together, facing away from the direction of the throw. The majority of the weight is on the right foot, and the thrower balances on the ball of the right foot. The athlete rapidly drops the torso so it is parallel with the ground and initiates unseating by rocking back on the heel and dropping the center of mass in the direction of the throw. Some athletes using the dynamic start will plantar flex the right foot prior to the drop and unseating in order to increase the length of the downward path of the thrower's center of mass. Variations of the free leg extension exist, however in all cases the athlete rapidly flexes the left knee, bringing the left leg underneath the center of mass prior to unseating.
Glide Modifications. There are two major variations of the traditional glide technique. Throwers sometimes utilize a shuffle technique where the feet begin perpendicular to the direction of the throw rather than pointing away. This technique limits technical errors for beginner throwers who are not proficient in turning the right foot in the flight phase. A step back technique is also seen where the thrower begins in a traditional glide position, but steps to the center of the ring with their right foot rather than gliding. This technique eliminates the flight phase for developmental throwers. Variations in Base-Width. Certain glide shot put styles are commonly classified as one of two general models. In the Long-Short style, the athlete displays a long flight phase, and a delivery position where the base of support is narrower than shoulder width, with the right foot located under the center of mass. This fosters vertical force application as well as enhances shoulder hip separation. The contrasting Short-Long style displays a minimal flight phase and a delivery position where the base of support is wider than shoulder width. In the Long-Short model, the right leg is located outside the center of mass at the delivery position and is thought to allow force application over a longer path in support. Independent Free Arm Philosophies. The timing of the sweep of the free arm at delivery is a concern. Typically, the free arm sweeps in unison with the turning of the torso. However, in an independent arm style, the sweep of the free arm precedes the turning of the torso to some degree. This style is often considered advantageous in establishing an elastic response across the chest. It may also result in improved timing between the turning of the torso and the elastic responses generated in the lower body. REVERSE STYLES The Non Reverse Style. A technical variation of the glide shot put is the non reverse throw. This potentially offers the advantage of a better pedagogical model to develop the front leg block and eliminates the possibility of premature reversing. Its potential disadvantage is reduced aggression during delivery due to concerns centering about establishing the block. This style is seldom seen at high levels, but the pedagogical advantages make it potentially a good style for developmental throwers and as a training exercise. The Full Reverse Style. In a full reverse, the thrower becomes airborne and adjusts the stance in flight. This type of reverse is allows an aggressive delivery, but may cause some force losses as a result of the airborne strike. Partial Reverse. In a partial reverse, delivery is completed while still in double support, and the stance is adjusted after the release. This insures that all possible force has been delivered into the shot, yet less dynamic reverse might result in decreased aggression Boo Schexnayder was primarily responsible for the content of the majority of the Track & Field Academy's course curriculum including this excerpt from the Throws Specialist Certification course text. Don Babbit also contributed to the throws curriculum. |
