|
By: Ed Barber Originally Published in: Techniques Magazine Provided by: USTFCCCA A sprinter knows whether they have good speed relative to other sprinters, but good coaching and a good understanding of how to reach maximum velocity efficiently will take the sprinter to the next level. The purpose of this paper is to emphasize the transition phase, that is, the section of acceleration that comes after the drive phase when the sprinter transitions their acceleration to maximum velocity.
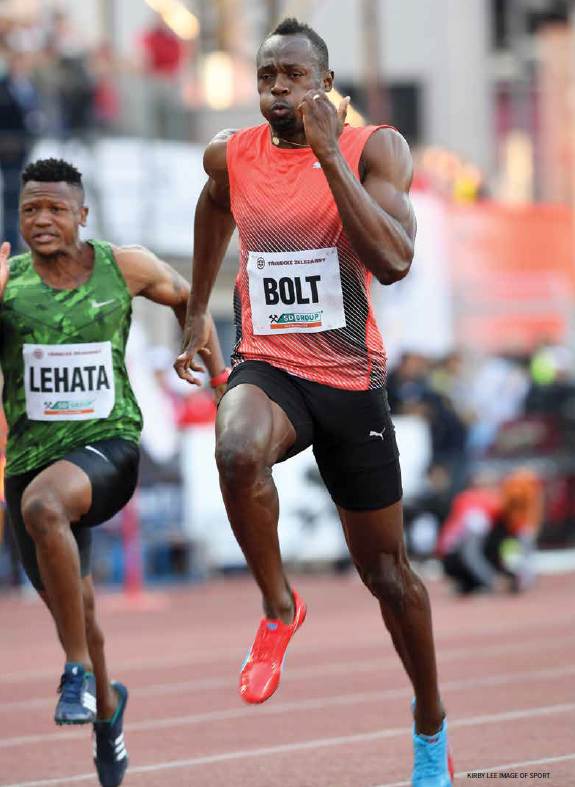
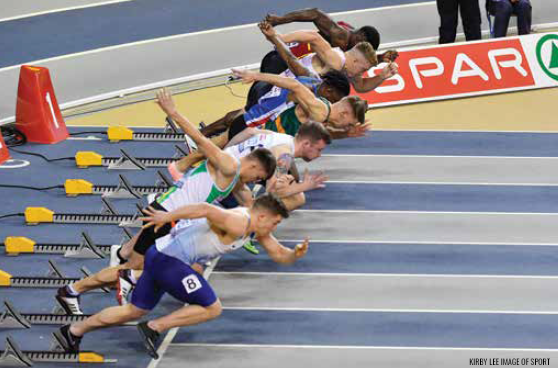
This paper will first define what is meant by the TRANSITION PHASE, followed by tips and drills that focus on coaching proper skills and mechanics that predicate reaching maximum velocity. Acceleration is both a drive phase, followed by transition phase. The application of the drills provided is for any coach, whether a college coach, a club coach or a high school coach. For years, coaches have been breaking down the 100 meters sprint into phases with many variations. The basic phases are simple: acceleration, maximum velocity and speed maintenance. Coach John Smith has seven phases, breaking down the start to include reaction time and block clearance, then the drive, acceleration, top speed, speed maintenance and finish. Coach Tom Tellez has five phases: reaction time, block clearance, acceleration, maintenance of maximum velocity and lessening of deceleration. All these examples of phasing have the purpose of helping the sprinter reach maximum speed efficiently. Therefore, the TRANSITION PHASE defines the time during acceleration where the sprinter goes through the process of transitioning from horizontal force to vertical force. The transition is the part of acceleration that has qualities differing from the drive phase in terms of the mechanics involved. Transition mechanics involve a shin angle, and that is a determinant of the change from drive to transition. Coming out of the blocks the shin angle moves from approximately 45°, to 90°. As the drive phase is ending, the shin angle moves perpendicular to the ground. There is also a change in posture when the horizontal forces of the drive phase end and transition begins. The body becomes perpendicular as well. There will be a line from the stance foot, through the hip, to head. This has been referred to as the power line. The power line of the body goes through the same angle change as the shin, (45° to 90°) so that the application of force is the same throughout the acceleration. There is not a prescribed meter mark on the track during acceleration where the transition begins. Each sprinter will be different, relative to their development and to their strength. It is helpful to know, however, approximately when the drive phase ends relative to that 90° angle of the shin. One tool coaches can use to find this 90° angle is video. The coach can suggest to the athlete that, "We are going to work on extending the drive phase." The sprinter should be told to push for as long as possible. The coach will have set up cones every 5m out to 25m. The sprinter will start from the blocks as if running the 100m race. The sprinter is filmed accelerating to about 40m. Film 2 to 4 rehearsals. While viewing the video, time each 5m segment and record the intervals. Early on, each timed segment will decrease, along with an increase in stride length. There is no longer acceleration when the time increases. The coach knows that this is the point where the drive phase ends. The transition phase follows the drive phase and extends acceleration. Transition biomechanically ends the pushing by the quadriceps, and increasingly emphasizes the hip extensors, which includes the glute/ hamstring muscles. With the posture erect, the transition phase force is maximized, having the magnitude and direction of force vertical in application by the end of the drive zone. During the transition, stride frequency is increasingly added to the stride length. Developing stride frequency is the goal of transition. Usain Bolt had his greatest acceleration rate between 30m - 70m, (.86, .83, .82, .81 in 10m segments; Speedendurance.com), this is his transition phase. Increasing speed propels the sprinter into the front-side kinematics that characterize sprint form at maximum velocity. Regarding acceleration in both the drive phase and the transition phase, it is important to postpone maximum velocity for as long as possible. Drive and transition must be optimized before maximum velocity is reached. That is, the drive phase reaches an optimal stride length before frequency becomes the priority, then the transition phase progressively adds frequency until both the OSL and the OSR have reached maximum velocity. The sprinter should be as far down the track as possible before reaching their maximum velocity. Also, no one, not even Usain Bolt, has accelerated past 7 seconds. To continue to accelerate past the end of the transition phase works against speed maintenance. In fact, just the opposite occurs: deceleration is accelerated. Jack Blatherwick (Force, Power, or Acceleration, 2013) sheds light on the transition phase as it correlates to the principles of physics with acceleration. If acceleration is kinematically defined as a change in velocity, then the question relative to the transition phase is how a sprinter can get the greatest velocity out of the transition phase. Jack states, "Many coaches and athletes, (scientists and professors), incorrectly believe that explosiveness and explosive starting from a standstill is where athletes demonstrate the greatest power, like exploding out of the starting blocks...If an athlete accelerates at the same rate between 0 to 5mph, as he does between 5 to 10 mph, his power is greater from 5 to 10 mph because the velocity is greater, power = force x velocity, and there needs to be substantial velocity for the power to be maximum." Jack also notes that there needs to be a high rate of acceleration as well, because force = mass x acceleration. All coaches encourage block clearance and the drive phase. It pays to work just as hard on what we are identifying as the transition phase. One approach that coaches can use is to make sure that transition is built into their program throughout the year. With the transition phase, it is easy to set up a transition zone (examples follow) so that sprinters can rehearse proper biomechanics and a pattern individualized allowing for a kinesthetic sense to be developed. First and foremost, the coach should emphasize correct posture for optimal sprint technique. As any sprint workout begins, the shoulders should nearly be perpendicular to the ground. If the shoulders are significantly pressed forward, negative sprint mechanics will result. Casting the shin from the knee occurs, resulting in a breaking effect as the foot strikes the ground. Also, the sprinter's stride will not continue to reach an optimal stride If while sprinting ,one does not keep the body forward, a foot stride too far in front of the center of mass may result. This forward lean does not mean bowing. The power line, (hips over the support foot, and shoulders over the hips), is still to be maintained. It is the PLANK idea, a slightly forward plank. This degree of forward lean will be only slightly different for each sprinter. The posture must always be in the mind of the athlete. Good posture, therefore, allows the power line to produce the required power angle of force. The direction of the force must be vertical. Another important component that is related to the posture is leg stiffness. Leg stiffness is the ability to resist the force of gravity as each foot strikes the ground. Leg stiffness was found by Dr. Peter Weyand to be an Important determinant of efficient sprint speed. (Weyand 2014, JAP) The body is not overcome by gravity with each step. If the body sinks, it takes longer to come off the ground in the stance phase, resulting in slow ground contact times, (GCT), thereby slower maximum velocity. The sprint coach can next teach the biomechanics of the sprint cycle and how these biomechanics effect maximum velocity. These mechanics involve skills that can be rehearsed and learned in a transition zone. In the sprint cycle, the proper positioning of the legs, and how vertical force is produced, becomes the priority. The coach must teach their sprinters to have a feeling, a developed kinesthetic sense, of the proper positioning of the legs. This kinesthetic sense is related to the timing and rhythm of the repositioning of the legs. LEG POSITIONING & VERTICAL FORCE The coach moves the sprinter on from posture, to the mechanics involved in leg positioning. Sprinters start an acceleration and move into transition using a cue that I have found helpful in addressing the leg positioning. It is to use Charlie Francis', "whip from the hip". This cue describes the powerful force by which the knee is driven forward and up. "Up" is not to be confused with a piston-like mechanic. Think out at a 45° angle. This acceleration of the swing leg moves the focus from the horizontal force in the drive phase, to a skill that will make it mechanically possible to achieve maximum velocity, (vmax), because it is during How does an acceleration of the swing leg lead to greater GRF? In referencing physics again, we know that "for every action there is an equal and opposite reaction." Therefore, the greater the force given to accelerating the swing leg forward, the greater the force will be on the knee as it moves back toward the ground. A stretch reflex in the hamstring/glute muscle group pulls the knee back with the same and equal amount of force applied in the swing leg. If the swing leg is positioned appropriately, then the strike on the ground will produce the kind of GRF that reduces GCT. The resultant rebound effect from this strike will pop the foot back up under the hip in a coordinated time relative to the swing leg, (another equal and opposite principle). This "pop, pop, pop" is executed properly when there's great posture, and a "hard Z" (Vince Anderson's descriptive picture of Seagraves knee up, toe up, heel up), allowing force to be vertically applied. Dr. Weyland's study (Weyand 2000, JAP) has shown another principle related to the idea of accelerating the swing leg forward. Weyand states, "We conclude that human runners reach faster top speeds not by repositioning their limbs more rapidly in the air, but by applying greater support forces to the ground." Dr. Weyand tells coaches to focus on the strike. This is a sprint paradox in that one cannot apply the force Dr. Weyand references unless the swing leg is positioned to strike. The heel does rebound under the hip, but the leg is not initially in the Anderson "Z". TRANSITION DRILLS The following drills are resourcing for coaches. If working the transition zone is new to coaches, the drills will be a good for one's toolbox. There will be a run-in to a transition zone for many of these drills. This run-in simulates the drive zone. Each run-in has two purposes. First, the sprinter is to be at 80% of their drive speed, and second to be near their optimal stride length, (OSL). Use an extended warm-up on transition days. A hurdle plyometric activity is called for to start the session. As the sprinter springs over the hurdles, have them feel what their heels are doing while passing over the hurdle. Encourage, as part of the pop-off, to pull the heel under the hip. This anticipatory mindset prepares the sprinter for the mechanics used in the following exercises. As the sprinter enters the transition zone, the stride rate (SR), should builds through a 25m to 30m practice zone. This does not mean that the effort is less than 100%. There is still maximum force applied to the ground. It is just that the rate by which the force is applied is distributed throughout the zone. This first drill explains that. 1. SPLIT ZONE The coach puts a cone in the middle of the zone, telling the sprinter to use 90% speed of the swing leg during the first interval, and 100% in the second half. This rehearses the postponing of vmax. When vmax is reached prematurely, it requires running with full speed longer than is physiologically appropriate. During the competitive season, this modeling drill and the transition zone may be 45m to 50m long. At that time two cones are used to divide the transition phase into three segments of, 15m, 15m, 15m, with the "whip from the hip" increasing in speed from 80%, to 90%, to 100% through the segments. This would be only 3 to 4 steps per interval, so the change in leg velocity happens fast.
Therefore, another option for training the sprinter is to practice the rate of switching in the swing leg through longer zones. Define the length of the zone relative to the phasing, but for this discussion 25m is used. The workout would include: 1 x 25m @ 80% velocity of the leg swing, a second run, 1 x 25m @ 90%, and a third, 1 x 25m @100%. Use two to three sets depending on the time of year, and 3 to 4 minutes for the recovery between reps. The set rest should be 8 to 10 minutes.
The use of a transition coaching cue might be, "whip to a ‘hard Z'" or "whip to Z", which is a nice combination of Charlie Francis, and Vince Anderson in this cue. Again, this cue describes the knee up, heel up, toe up sprint position Loren Seagrave uses describing the leg while sprinting. This leads to the second biomechanical position touched on above, which is the strike of the foot against the ground. Many developing sprinters have not yet understood, felt, or practiced the skill of accelerating the foot from above the ground. They cast the foot to the ground and then apply force. 3. WICKETS The wicket drill uses a drive phase zone into a wicket zone. The wicket zone used after the drive phase is like the 100m. A critical aspect of the drive phase in this drill is to make sure the torso progressively moves toward perpendicular. The sprinter cannot hit the "hard Z" over the wicket if the posture does not allow for it. The wicket places the knee in a position where they learn to strike from the top. Also, measuring the sprinters stride length at the end of the drive phase can help the coach place the wickets in a distance that will make a smooth transition zone. In terms of measuring, the coach needs to know the sprinters OSL. The OSL is found by taking a trochanter length measurement in meters. The length is then multiplied by the following: female x 2.35/ men x 2.43. This produces what the sprinters SL should be, their OSL. Progressively move the distances between the wickets as competence is demonstrated, and as periodization dictates, (e.g. below). Periodization also considers where the athlete is in their competitive season for changes. 4. PROGRESSIVE HEIGHT WICKETS After driving from the blocks, (maybe, out to 10m to 15m) and entering the wicket zone, the next 10m has 6" wickets, then 10m at 9", and the last 10m- 12". Again,the spacing of the wickets is based on one's OSL, and where the season is relative to this drill. If the season is just starting, the coach should put the spacing to only be 85% of the sprinters OSL. Entering the wicket part of the drill, the swing leg is forced up and out, but the emphasis for the sprinter is to strike the ground from the top with a pop. 5. WICKET CONTRASTS This drill is a contrast method where the sprinter goes through a series of wickets, followed by a natural run. Using the wickets, recover the heel under the hip. By pulling the heel up under the hip two things result. The knee will be higher and the "strike from the top" principle can be rehearsed. Next, a natural run is done, working to position the heel under the hip as in the wickets. This going from a wicket run, to the natural run, gives sprinters a rehearsal that applies the proper biomechanics without the wickets under them.
6. CONTRAST II The purpose of this next drill is just like the previous drill except the contrast is in the same run. The previous drill has the natural run done in a separate rehearsal, connecting proper mechanics forced by the wickets into then running naturally. The idea in this drill is to hit the "hard z" after the forced constraints of the wickets within the same run. At the end of the wickets, the sprinter goes immediately into a natural section, running the same way as when the wickets were under them. These distances between the wickets are only an example.
The sprinter is to focus on relaxation so as to be able to apply vertical force from the "Z", striking from the top. This means that when the foot is over the knee, and in the "Z ", the knee is accelerated to the ground with a POP, (M Young, BOING) This must be anticipated and can only be accomplished if the swing leg is properly positioned. With many rehearsals, a kinesthetic sense is learned regarding the timing and rhythm of sprinting. 7. STICKS The purpose of the Stick Drill (in this situation) is to match an increase in SL with the increase in SR. Set up zones with sticks in a line that has progressively longer intervals between the sticks. The intervals are increased out to an optimal stride length, (OSL). Below are some examples of stick zones, READING LEFT TO RIGHT. 4 x 6'6" 2 x 6'7" 2 x 6'8" 2 x 6'10" 4 x 6'7" 2 x 6'8" 2 x 6'9" 2 x 6'10" 2 x 7'4 x 6"8" 2 x 6'9" 2 x 6'10" 2 x 6'10" 1 x 7' 1 x7'1" * adjust for developmental levels. From a 20m to 30m run-in, the sprinter enters the stick zone using the "whip to Z" principle, accelerating the swing leg out, and forcefully popping the ground to make the next interval. It is critical to not cast from the knee to make the intervals, but rather apply greater ground force. If casting occurs, then the sprinter needs to use a shorter interval line zone. Each of these line zones are around 30m in length. This makes for a good transference to a 100m with a 30m accelerate phase and a 30m transition phase. Again, these examples are starter ideas for a coach to build from. General Prep/ Specific Prep/ and the Comp phasing can align the zones. Maybe the coach wants to not build up to the SL but utilize a zone where a constant length is utilized so the sprinter might work at 80% of their SL in GP, 90% in SP, an 100% in the COMP phase. Another idea may be to add some sticks to lengthen the zone to 40m. Regardless, providing rehearsals at their OSL, and whipping from the hip, is key. 8. SLED CONTRASTS The purpose of this drill is to learn to transfer the applied force used to accelerate the sled, to the natural sprinting of the transition phase. Between the sled pull and the natural sprint there will be a 2 to 4-minute rest. The sled used should not be heavy.
9. BLENDING As the drive phase begins to end, the sprinter is positioning his body for the transition phase. The following is reviewed because these mechanical positions must be in place before the transition phase is executed properly. The mechanical positions the coach should look to see includes:
When the sprinter reaches their transition point, their shoulders are nearly perpendicular, they are beginning to whip from the hip and they are looking to add frequency to the achieved stride length. The following workout is very intense, and the coach needs to make sure their sprinters are ready. SET 1. 3 x block starts (steps 0, 1, 2) - put a cone at 4m as a stopping point 3 x, 3 step walk-ins to a 15m drive phase 3 x block clearances plus drive phase to 25m A key element to look for is a push that continues even though the posture is moving towards 90* SET 2. Use a transition phase from 20m out to 50m, plus a flying phase of 30m This blending has the OSL and the OSR synchronizing to help the sprinter learn how to relax. Relaxation postpones the onset of deceleration. This Blending is run 2 to 3 times with 8' to 10' for recovery. 10. BLENDING II Use a 3-step walk-in to a 15m drive phase. <4'> (A) Next, a 20m jog-in (up to 80% speed) to a transition phase 30m in length. <4"> (B) Now Blend them: a 3-step walk-in to a 15m drive, with a 30m transition. (C) A, B, and C are one set. 2 to 3 sets are used depending on the time in the season and the fitness level of the sprinter. 10. ASSISTED There are two modes of assisted training to be used, downhill is one, and surgical tubing is another. 1. HILL WORK The downhill drill begins on the flat, the flat would simulate the drive phase. At the crest, the downhill slopes off at about 4 to 5 degrees. This degree of slope is one that you may have to experiment with to find what works best with your athletes. To begin, the sprinter starts accelerating toward the crest at nearly full speed. The torso should come up and the stride should be open. At the crest, the sprinter is ready for full speed and must keep their torso perpendicular to the hill as they increase the velocity of the swing leg. Letting gravity help with the velocity of the swing leg the velocity increases through a 15 to 30m meter zone. Be careful to notice if they lean back or the speed increases to where they lose control by casting. Shorten the zone until they can master the distance. This workout could be done in sets of 2, with 3 repetitions in each set. The rest between reps should be 4 to 6 minutes. The set rest between 8 and 10 minutes. This is a dangerous exercise! Progressions should lead to a readiness for this drill. 2. TUBING
This may seem like too short of a period, however, consider how long of time the transition is in a race! RESOURCES (USATF, 1999-2015) (Seagrave, Monchbahani, & O'Donnell, 2009) (Blatherwick, 2013)(Pfaff, Dan, 1999) (Young, Michael, 2012) (Bolt, Usain, 200) (Blatherwick, 2013) (Peter G. Weyand, 2000) (Kenneth P Clark, 2014) ED BARBER IS A LEVEL III COACH IN SPRINTS/HURDLES WITH USATF. PRESENTLY COACHING AT AMERICAN RIVER COLLEGE IN SACRAMENTO CALIFORNIA, HIS LAST TWO PRE-COVID SEASONS RESULTED IN CCCAA STATE CHAMPIONS IN THE DECATHLON. COACH BARBER HAS COACHED HIGH SCHOOL AND COMMUNITY COLLEGE TRACK SINCE 1978 RESULTING IN NUMEROUS ALL-AMERICANS AND STATE CHAMPIONS. |
