| Bunt – Kill Zone vs Sacrifice |
| By: Todd Guilliams
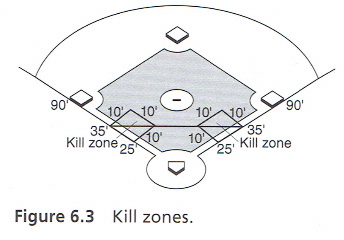
Originally Published in: High-Scoring Baseball Provided by: Human Kinetics The kill zone is an area located adjacent to the foul lines 25 to 35 feet (7.6 to 10.6 m) from home plate and approximately 10 feet (3 m) wide (figure 6.3). A skilled bunter can place a drag bunt or a sacrifice bunt in this kill zone. A bunt in this area creates pressure because it is placed away from the catcher, pitcher, and corner infielder, and, in most cases, it forces the fielder to hurry when he is trying to retire the batter. The goal of the bunter is to place a bunt in the kill zone every time. This mentality of putting the ball in a good spot and creating pressure is the proper mind-set of a high-scoring offensive player. His priorities are to place bunts in kill zones, create pressure, advance the lead runner, and, lastly, to reach base safely. As the name suggests, the sacrifice bunt surrenders an out in exchange for advancing the runner. It is most often used to score a single run late in the game.
The sacrifice should be the first bunting skill mastered. After that, the logical progression would be mastery of the drag bunt, followed by the push bunt, safety squeeze, and squeeze bunt, in succession. The order is a reflection of the frequency of each bunt during games.
|


 The kill zone bunt, on the other hand, has pressure as its primary objective, which the offense hopes will result in a multiple-run inning. The kill zone bunt will not only advance the lead runner 90 feet (27.4 m) but also afford the offense the opportunity to have a big inning by not giving up one of its 27 precious outs. Learning to deaden the ball so that it rolls only in the 25- to 35-foot (7.6 to 10.6 m) box is an art that requires many hours of practice.
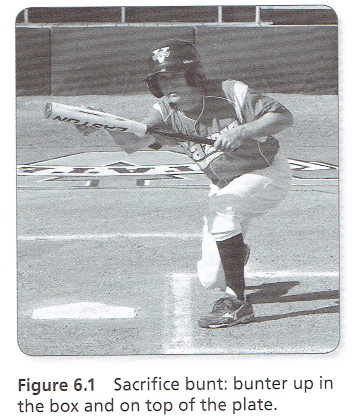
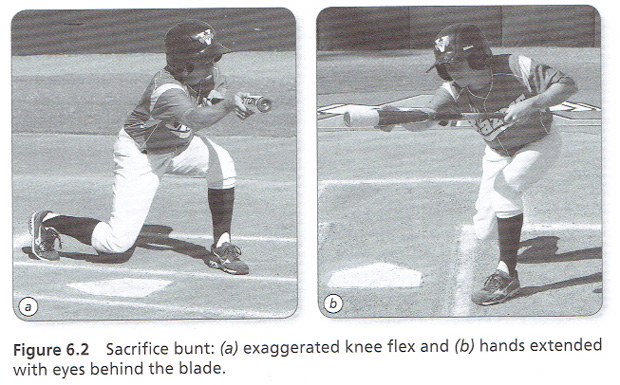
 The early turn gives the bunt away, but the tradeoff is that the batter has plenty of time to get set with an exaggerated knee flex (figure 6.2a), the barrel at the top of the strike zone, the hands extended, and the eyes behind the blade (figure 6.2b). The early turn also allows the batter to pull the bat back to slash in the event that the defense overplays the bunt. Placement and pace are the keys to the sacrifice bunt. The bunter must preset his angle and be extremely steady, making sure that he does not jab at the baseball. Instead, he catches the baseball off the end of the bat. To reach the low strike, the bunter must lower his knees and his chest but not drop the barrel, because doing so will often result in a pop-up.


